Category Archives: Stampin’ Up!

Happy Birthday Shaped Card

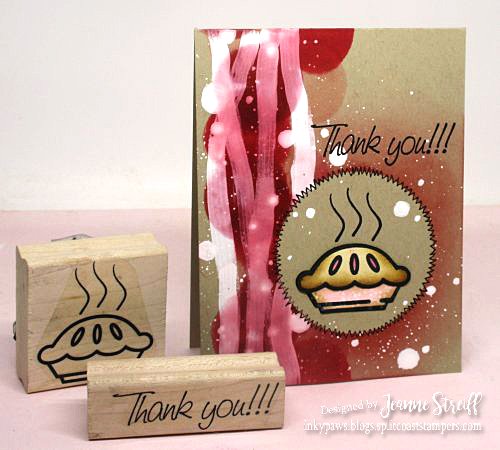
I have a sweet shaped birthday card to share today using the  Happy Birthday Balloons stamp from Simply Stamps and a card die set from Sizzix.

Birthday Present Shaped Card Jeanne_Streiff

One thing I really like about stamps from Simply Stamps is they are clear stamps mounted onto a repositional sheet on a wood block. So if you like wood blocks you can use them as is or if you like clear stamps you can peel them off and use them with you acrylic blocks or in my case the MISTI from My Sweet Petunia.

1a Birthday Present Shaped Card Jeanne_Streiff

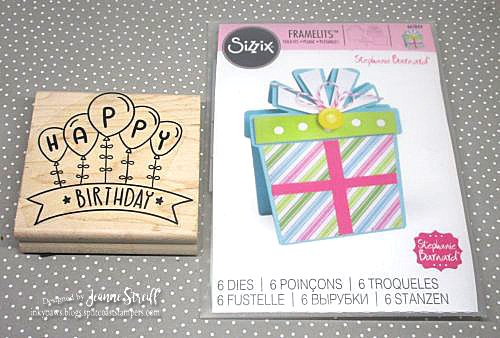
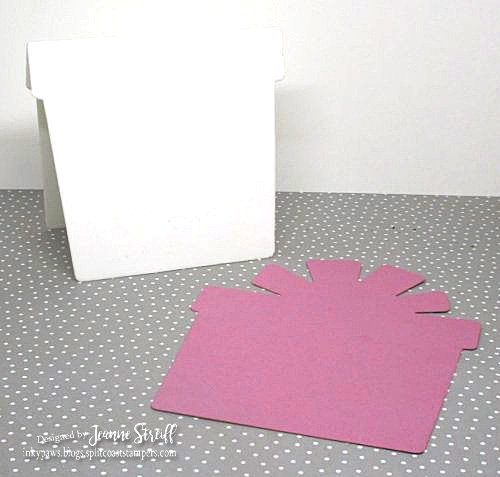
I started out with die cutting the pieces for my card back. I used the (661844) Gift Card Fold- its die set from Sizzix. It’s so cute.

1 Birthday Present Shaped Card Jeanne_Streiff

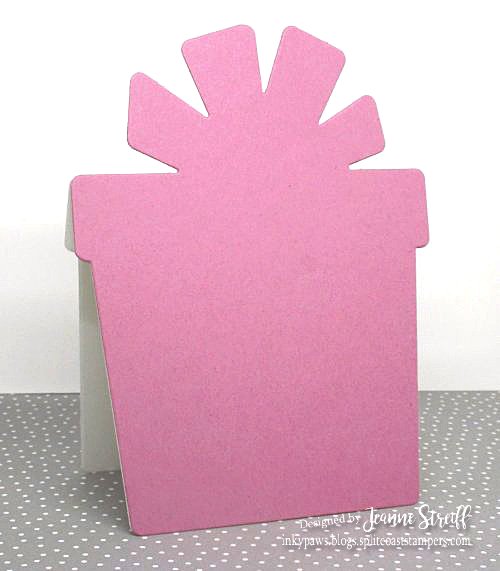
Then I assembled the front to the folded card back.

2 Birthday Present Shaped Card Jeanne_Streiff

I stamped the balloons I colored the balloons and cut them out to layer later.

3 Birthday Present Shaped Card Jeanne_Streiff

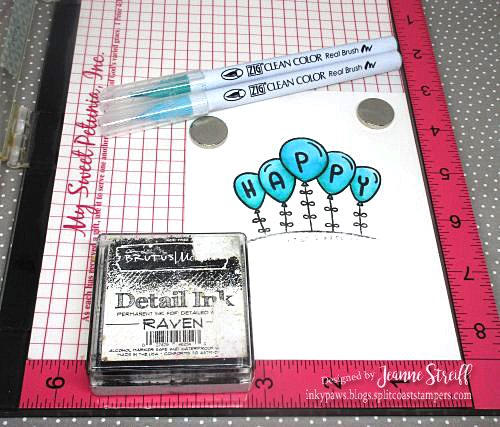
Next I stamped the banner. It will be cut out and layered. Ignore the smudge. Since I will be cutting this out it won’t matter.

4 Birthday Present Shaped Card Jeanne_Streiff

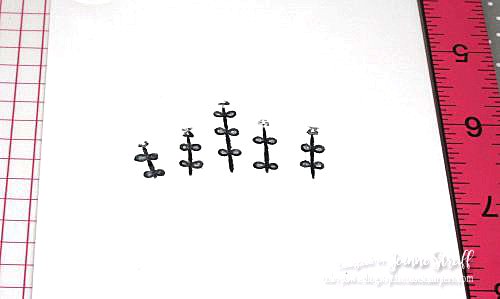
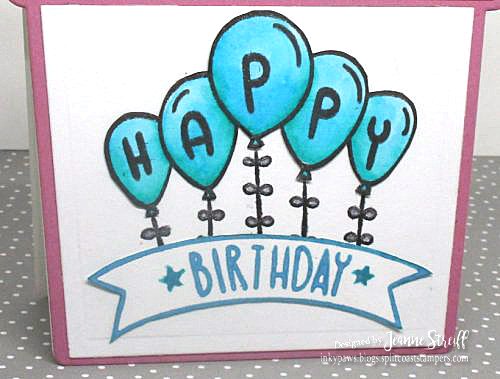
I stamped the middle section of the Happy Birthday Balloons stamp onto white cardstock. This with be die cut as the center panel of my card and the base for my balloons and banner.

5 Birthday Present Shaped Card Jeanne_Streiff

Here it is after die cutting and my balloon and banner layered on it. Perfect it!

6 Birthday Present Shaped Card Jeanne_Streiff

I assembled the rest of the die cut pieces.

7 Birthday Present Shaped Card Jeanne_Streiff

To finish my card I added some dots of glitter glue along the pink panel, added some pen stitching to each of the layers and then made a little torn paper flower to add a little dimension to the “bow”. To make my flower I tore two rough circles from pink cardstock and crumpled them. Then I layered the flower pieces and added a dot of white acrylic paint to the center.

Hop you enjoyed my project!

AA Great Day

Daisy Bookmark Card

It’s always fun to make a card that includes a little gift. Today I’m going to show you how to create a bookmark in a card using stamps from Simply Stamps.

Daisy Bookmark Card Jeanne_Streiff

I created my card first by making a card back from pink cardstock and then creating a small pocket at the bottom. I glued just around the sides and bottom of my pocket so I could slip my bookmark in later. After it was all put together I stamped my I Love You Hashtag Stamp in matching ink, added a border with a fine black pen and added a little bling.

1 Daisy Bookmark Card Jeanne_Streiff

Next I started on my bookmark. I stamped the Heart Eyes Emoji stamp onto white cardstock (using red and black markers to get two colors). I then used a flower punch to cut out my flower.

2 Daisy Bookmark Card Jeanne_Streiff

I punched a second flower and then added some color with markers.

3 Daisy Bookmark Card Jeanne_Streiff

I used a paintbrush handle to curl the flower petals to get a little more dimension to the flower.

4 Daisy Bookmark Card Jeanne_Streiff

I layered my two flowers. Cute, huh?

5 Daisy Bookmark Card Jeanne_Streiff

I used a die cut (from Impression Obsession) to cut my bookmark from white cardstock. I used ink that matched my card back to stamp the Love You Hashtag Stamp diagonally until I covered the entire bookmark. I added a few splatters (I used the same ink and diluted it with a little water) for added texture and interest.

6 Daisy Bookmark Card Jeanne_Streiff

To finish my bookmark I added a border with a black pen and then attached my layered flower. Now it’s all ready to slide in the pocket of the card.

7 Daisy Bookmark Card Jeanne_Streiff

And here is another look at my finished card. This would be so perfect for your favorite little reader. You could even pair it with a book for a sweet and simple gift idea. I hope you enjoyed my project!

8 Daisy Bookmark Card Jeanne_Streiff

AA Great Day

Mmmmm… Pie!

I’m not sure if it’s maybe a hint that someone needs to make me a pie… but whatever made me make this card I like the outcome! I used stamps from Simply Stamps and my Mini MISTI from My Sweet Petunia.

BTW… Simply Stamps has Buy More, Get More Sale going on use code SPRINGSAVINGS

Yes… these are wood block stamps and YES I used my MISTI! The cool thing about most stamps from Simply Stamps is they are clear stamps mounted onto a backing sheet that is applied to a wood mount. So you can peel them off and use them with your .Fun huh? Best of both worlds.

Pie Thank You Jeanne_Streiff

I had this idea after I had some ink bleed through acrylic paint and I decided I would try and do it on purpose this time with a pattern.

I started by making a mask with a post-it note that I cut into a circle and placed on my card. I went ahead and stamped my Apple Pie image where it was going to go on my card as a visual aid for my design.

1 Pie Thank You Jeanne_Streiff

I used my Blending Tool to make a random circle border with Distress inks. and then sponged around my Post-it mask.

2 Pie Thank You Jeanne_Streiff

I used a paint brush and white acrylic paint and added some random wavy lines and then I splattered some paint.

3 Pie Thank You Jeanne_Streiff

I peeled off my mask.

4 Pie Thank You Jeanne_Streiff

Since I had my inks out I swiped them on some white cardstock and added a little splattering to the pink. I stamped the Apple Pie image twice.

5 Pie Thank You Jeanne_Streiff

I stamped the Apple Pie in my circle. I cut out the pie pieces and sponged a little before assembling and adding to my card on top of the stamped image.

7 Pie Thank You Jeanne_Streiff

To finish my card I added the Thank You sentiment a few more white paint splatters and a little faux stitching around my circle with a black pen.

8 Pie Thank You Jeanne_Streiff

Supplies: