-
Thank you for visiting my site!
The contents of this site, including digital images, text, tutorials, and designs ©2007-2020 Jeanne Streiff. The contents of this site are meant for personal inspiration only and may not be used for contest submissions or any other publication purposes. Many of the products I use are provided by companies I work for or their partners. I also use affiliate links... check out my sidebar for discounts!
Follow me!
Categories
Meta
-
Recent Posts
Archives
-
Impression Obsession
April 2024 M T W T F S S 1 2 3 4 5 6 7 8 9 10 11 12 13 14 15 16 17 18 19 20 21 22 23 24 25 26 27 28 29 30 Shop!
-
Category Archives: Papers
Impression Obsession Spring Die Celebration and Giveaway!
Welcome to the Impression Obsession Spring Die Release Celebration!
The Impression Obsession Spring Die Release Celebration starts today! Each day (April 1st – 3rd ) you can find a list of participants on the Impression Obsession Blog at 6am ET.
Every single blog will have a $25 gift certificate to give away for the event – so the more you comment through our Release Celebration the more chances to win!
All comments for all of the event days will be open until Sunday 7th at noon CT. All winner will be announced on Monday April 8th.
All of the new dies are available now!
You can find them all HERE
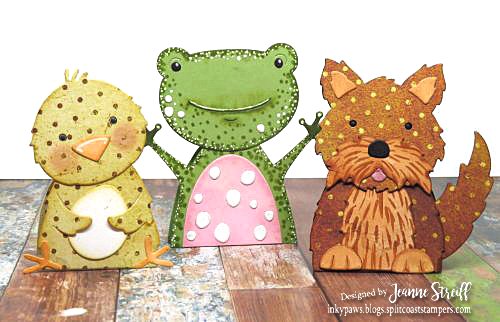
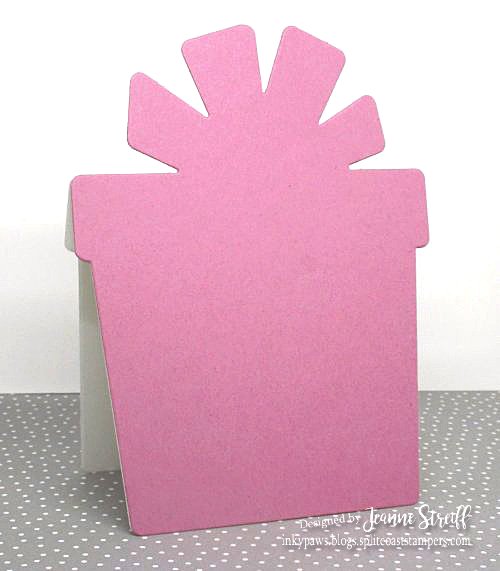
I created all of these little stand up animal cards the same way. I cut and scored a small card and then used the different body dies to cut the base shape (make sure your scored card line is below the cut line of the die). These are all around 3″ tall.
All of these dies were created by the super talented Anna Wight!!!
This one uses DIE786-P Chick
This one uses DIE788-V Frog
and my last project uses DIE793-Y Wirehair Terrier
Posted in Bo Bunny, Impression Obsession, IO Dies
Alexandra Renke/My Sweet Petunia Hop and Giveaway!
We will choose two lucky people who comment on the hop to win one of two prizes:
A $50 shopping spree at www.mysweetpetunia.com and a $50 shopping spree at www.alexandra-renke.com!
You must leave your comments no later than Sunday, June 17th, at 11:59 PM Central time and winners will be announced on Tuesday June 19th, on the Alexandra Renke and My Sweet Petunia blogs.
~~~~~~~~~~~~~~~~~~~~~~~~~
I just had to use these sweet giraffes! I used my Mini MISTI to position the cut out giraffe piece from Designpaper Giraffe so I could stamp the overlapping splatters (using Clear stamps Special Day). Once I was done I removed the giraffe panel (keeping my stamps on the MISTI and restamped onto the card. I finished by cutting out the sentiment (from Designpaper Giraffe) and the balloons from Designpaper Balloons. I added the balloon strings with a fine black pen. Love the coloring on those giraffes!
~~~~~~~~~~~~~~~~~~~~~~~~~~~~~~~
My next card was made by making a card base with Brushes with Pattern and then stamping some pretty splatters and rings with pink and red inks and then stamping the sentiment using my Mini MISTI . All stamps are from the Satisfaction set. I then cut a couple paint tubes from Tubes of Paint and attached them to my card.
Hop list:
Jeanne Streiff – you are here
Posted in Alexandra Renke, Alexandra Renke, All Occasion, Baby, MISTI Tool
Happy Birthday Shaped Card
I have a sweet shaped birthday card to share today using the Happy Birthday Balloons stamp from Simply Stamps and a card die set from Sizzix.
One thing I really like about stamps from Simply Stamps is they are clear stamps mounted onto a repositional sheet on a wood block. So if you like wood blocks you can use them as is or if you like clear stamps you can peel them off and use them with you acrylic blocks or in my case the MISTI from My Sweet Petunia.
I started out with die cutting the pieces for my card back. I used the (661844) Gift Card Fold- its die set from Sizzix. It’s so cute.
Then I assembled the front to the folded card back.
I stamped the balloons I colored the balloons and cut them out to layer later.
Next I stamped the banner. It will be cut out and layered. Ignore the smudge. Since I will be cutting this out it won’t matter.
I stamped the middle section of the Happy Birthday Balloons stamp onto white cardstock. This with be die cut as the center panel of my card and the base for my balloons and banner.
Here it is after die cutting and my balloon and banner layered on it. Perfect it!
I assembled the rest of the die cut pieces.
To finish my card I added some dots of glitter glue along the pink panel, added some pen stitching to each of the layers and then made a little torn paper flower to add a little dimension to the “bow”. To make my flower I tore two rough circles from pink cardstock and crumpled them. Then I layered the flower pieces and added a dot of white acrylic paint to the center.
Hop you enjoyed my project!