
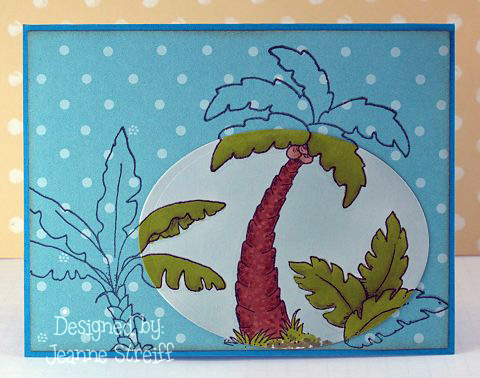
This technique is normally done with a white background. I’m not much of a rule follower so it would be fun with a colored background. Just a little hint… I tried it against assorted patterned papers and decided it made the image cut out pop more against a simple background.
Step 1: Position your stamps on a large clear block. Stamp images on both white and patterned paper.
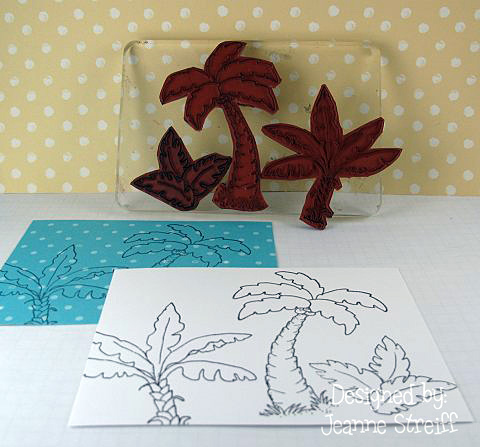
Step 2: Cut out part of the image (I used a Spellbinders die, but you could use a punch or even a stencil to cut)

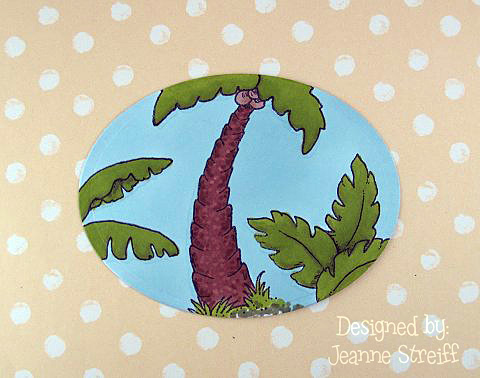
Step 3: Color images withing the cut out area.
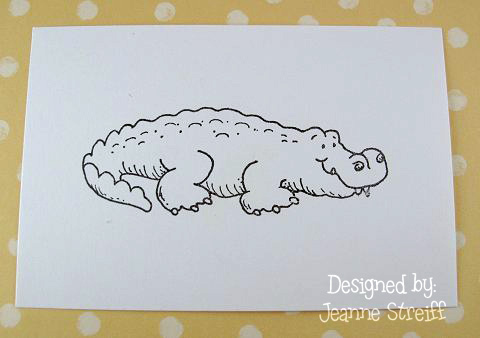
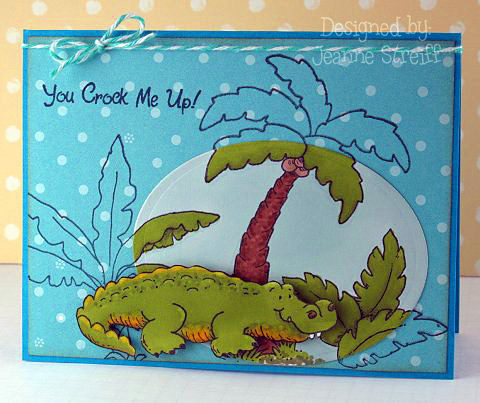
Step 4: Stamp alligator
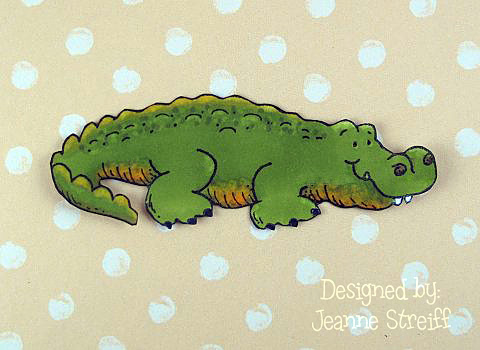
Step 5: Color and cut out alligator (set aside)
Step 6: Adhere stamped pattern paper piece to card back.

Step 7: Align images of the colored image panel and attach to card.
Step 8: Finish card by stamping sentiment, adding twine and attaching alligator with foam tape.
Supplies:
Stamps: High Hopes Stamps ( Q-040 Samson, H-165 Jungle Leaf Corner, F-126 Crock Me Up, R-082 Banana Tree, S-096 Palm Tree)
Papers: Discount Cardstock (Neenah Classic Crest Solar White, Baby Blue Dark), Patterned paper (unknown)
Other: Promarkers (0727, 0324, 0555, 0427, Y126, Y724, Y635, G629, Blender), foam tape, Nestabilities (Spellbinders), twine


2 responses to “Spotlight with a Color Twist Tutorial”